Developer Manual
General
The UI design goal was to create a modular and robust UI which does not rely on continuous data input. Due to the fact, that the Virtual Reality scenes will later be merged and therefore the setup will change, it was advantageous to not create one definite UI structure already containing all the desired elements. Instead, a modular, easy-to-adjust base was designed, which can be integrated in other scenes without much effort.
- Scripts:
- User Interaction Scripts: These scripts were already provided by the previous implementation and only needed to be adapted at most. This is the case for the SelectorTool, which now additionally provides information when a button is triggered and held and later released.
- Game objects:
- General game objects, which belong to the scene but not the UI, include Roboy, a cave and the camera rig containing the SteamVR controllers and headset.
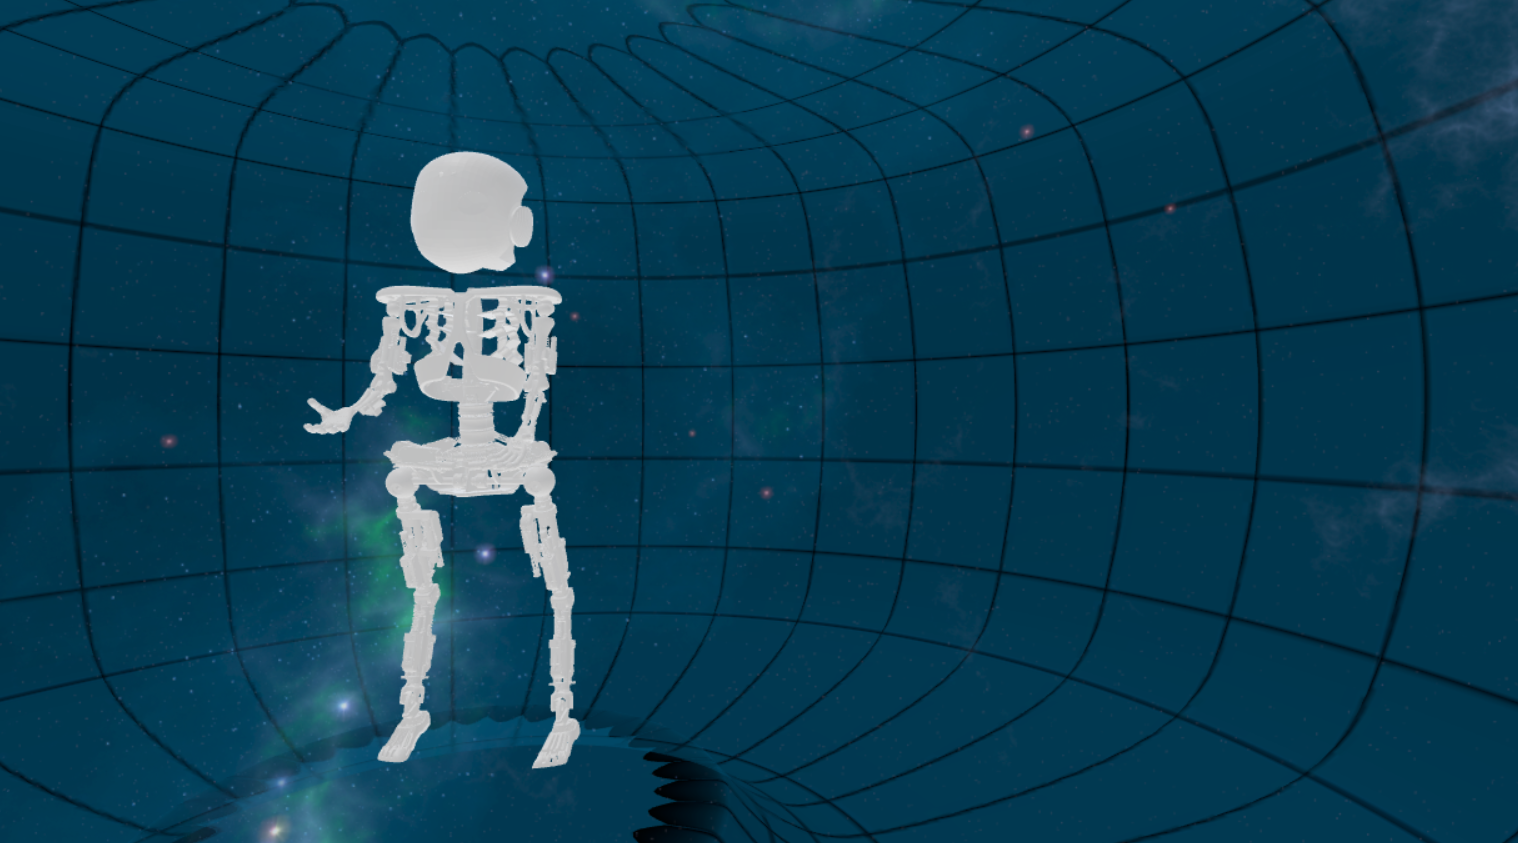
Roboy in a cave
Use Case
The following use case depicts an example activity, where a user changes the currently selected mode by touchpad.
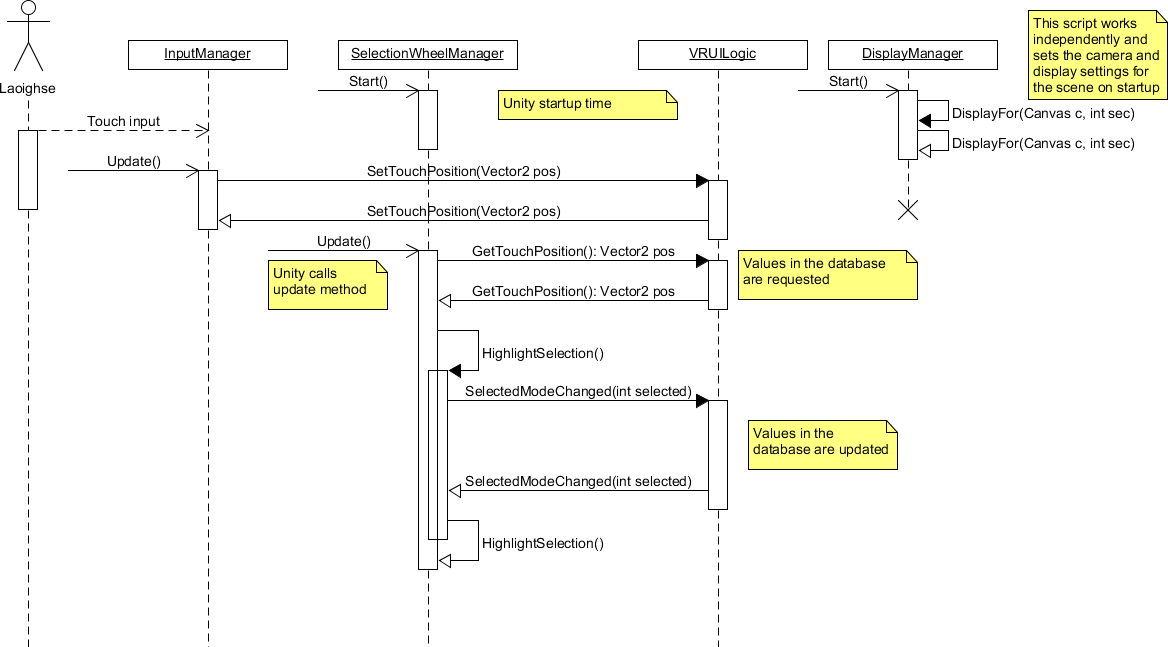
Sequence of method calls after user touch input initialized by Unity’s update function
UI Implementation and Structure
The UI can be structured in three basic layers:
Front-End
In this layer, objects, modes, and their respective items covering screens, labels, screen overlays and UI are contained. It serves as the frontend towards the user. The respective UI elements display the data they are given, but do not actively change or adapt to changes.
- Scripts:
- DisplayManager: This script automatically detects the number of connected displays on startup and uses the first to display the main camera on the main screen, and second camera on the latter. In case only one screen is found, it continues with the normal setup. It needs to be noted that the SteamVR glasses are not considered to be a Display by Unity.
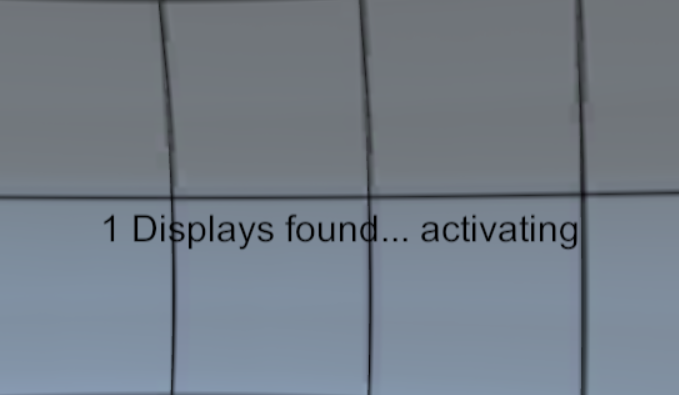
Display message
ModeManager: Four different scripts manage the displayed data in the respective mode. They are attached to the respective game object which represents the mode and contains all mode-related elements. The scripts are:
MiddlewareManager: Since tendons automatically display themselves, no other functionalities are implemented yet.
OverviewManager: This Manager provides an examplary hearbeat function and plots it.
ControlManager: This Manager provides a list of notifications on one of the panels and adds new list items as soon as it is notified of new notifications.
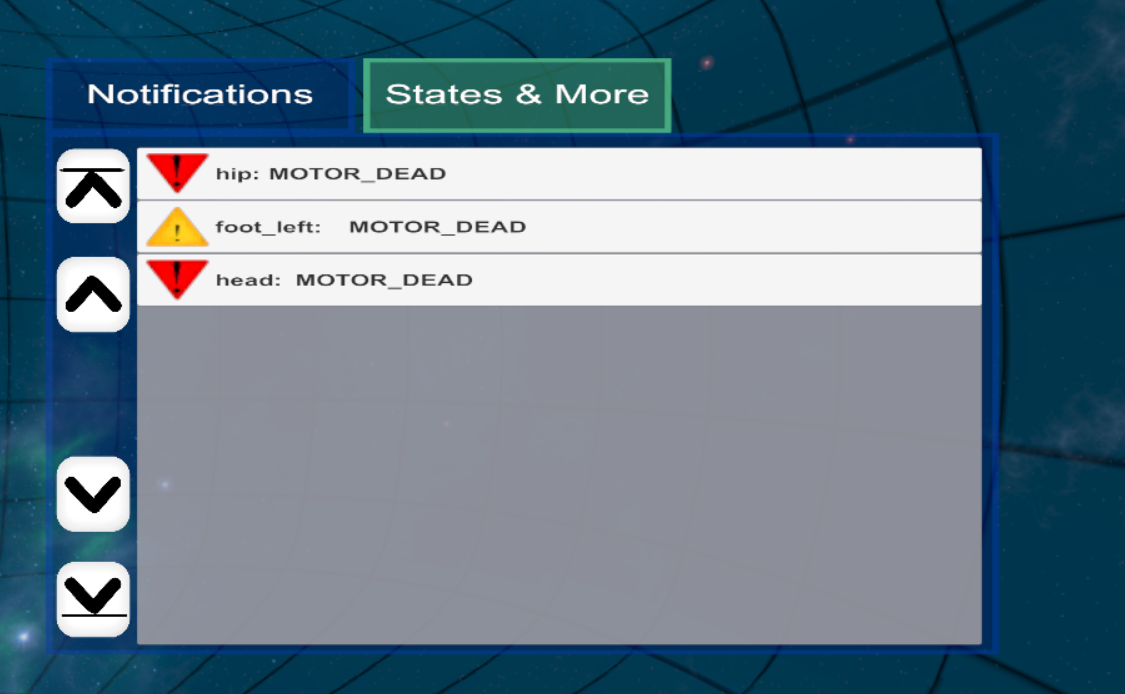
List of notifications
CognitionManager: Since no data type, which this mode would handle, is implemented yet, no functionalities are provided.ScreenTabManager: This script manages the correct display of the tab contents, since the objects may overlap or be covered or interfer with each other. It deactivates all content, that is not rendered last, the last tab page is fully activated.
RayOrder: This script is needed to adapt the order of canvases and the ray visible from the selector tool. The attribute in question cannot be changed in the Editor, that’s why this script was created.
RotateWithView: This script rotates the specified component around a predefined pivot point. The rotation that is applied comes from the y axis of the user’s headset, which leads to the object remaining at the same height but rotating in a horizontal circle around the point.
ScrollViewFunctionalities: For a ScrollView component, this script provides scrolling functionalities, including events and the methods performing the action. These are to be triggered by buttons which shall immplement these functionalities. It needs references to the scrollView object that is to be moved. Only vertical scrolling is implemented.
Notification: This script is attached to gameobject and together they represent a notification object. It contains all needed attributes and functions.
NotificationManager: Since some notifications and visualization methods always need to be displayed (no matter which mode) this script handles the display of the icons and halos created for each notification. It is attached to a UI game object which is always enabled.
NotificationListButton: This script initializes all values and fields of the item in the notification list and additionally manages OnClick() behaviour where it creates an additional info screen for the notification. This is currently in use in the control mode.
AdditionalInfoScreen: This script initializes all values and fields and manages the functionalities of the additional screen that is provided in control mode.
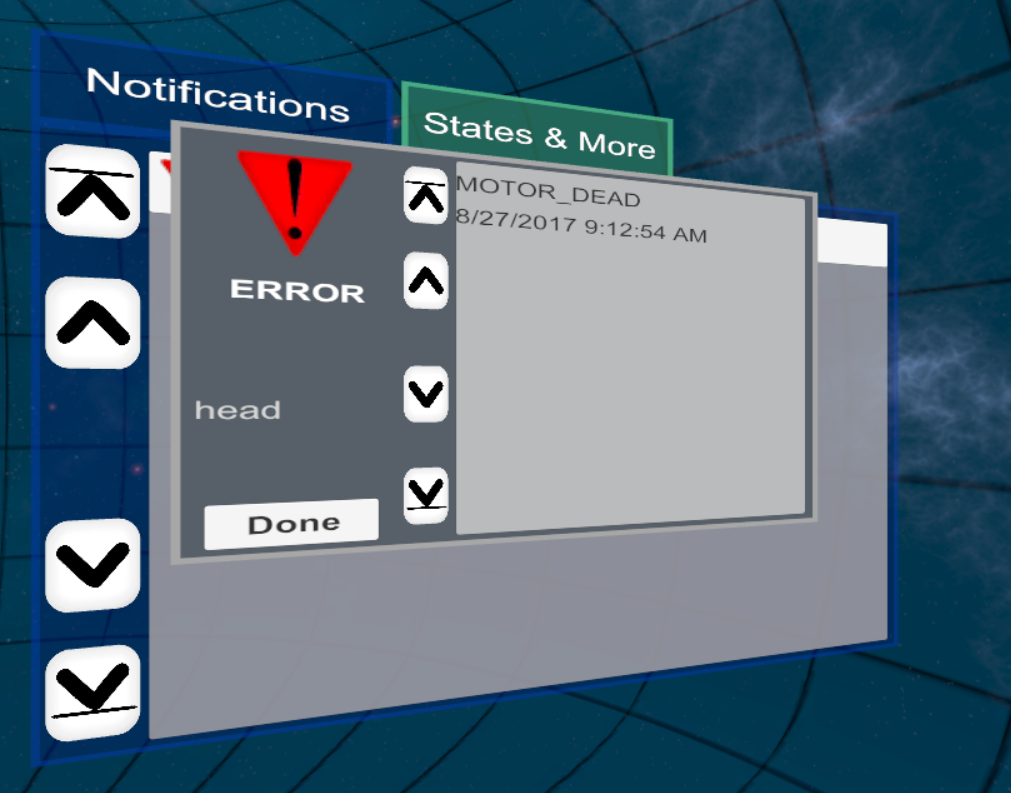
Additional screen displaying extended information about a notification
Tendon: This script is attached to a gameobject and together they represent a tendon object. It contains all needed attributes and function.
ExampleFunctions: This script proides exemplary data to test certain visualization techniques and the UI in general. This includes four tendons and repeatedly spawned notifications for now.
- Game Ojects:
modes: this empty game object contains all modes the user can choose with the selection wheel. These are dis- and enabled dynamically by the script UILogic.
Canvases: Each mode contains an individual canvas which is activated together with the parent (container) object. Canvas Render “Screen Space - Overlay” needs to be selected and the in-game camera belonging to the VR headset to display the Camera there.
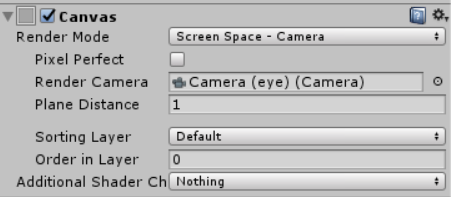
Canvas settings for VR headsets
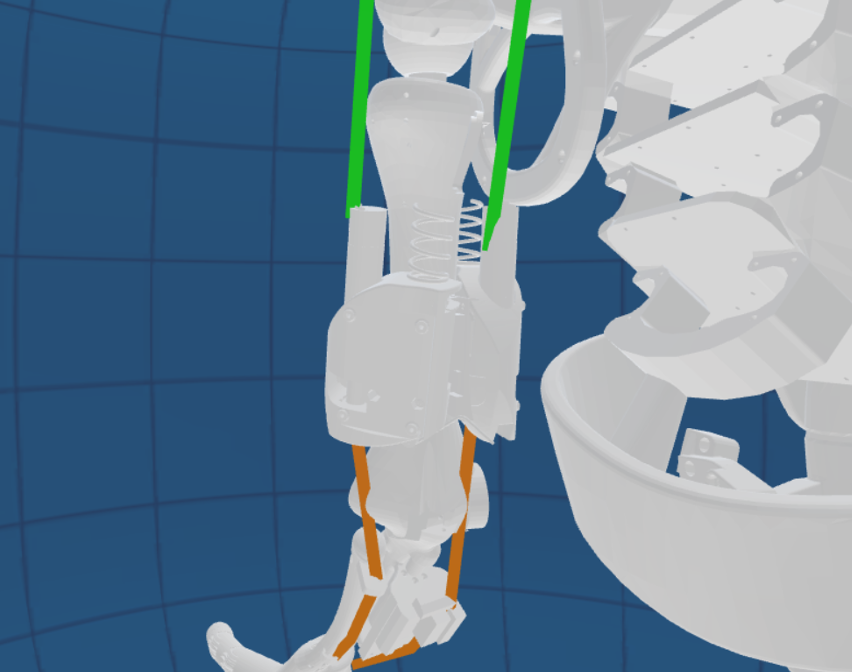
Note that even though the canvas is stretched to fit the screen size, the display of the headset extends further than the user’s view frustrum. In the picture below, the original canvas size can be seen as well as the actual view frustrum, which the user can comfortably perceive without too much strain on the eyes.
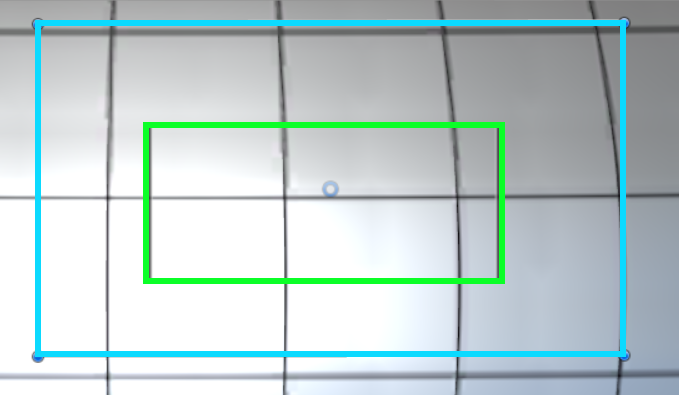
Canvas size in blue and view frustrum in green
Notifications: Theses are stored in a notification container. Notification visualization is managed for each body part in the BodyPart.cs script, as multiple errors, warnings and so on can be linked to one gameobject.
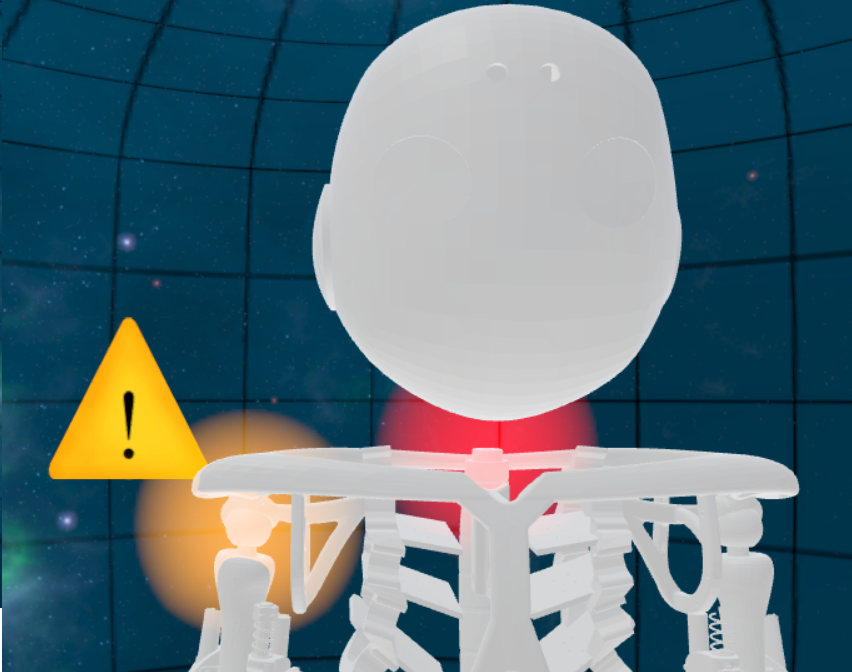
Notification visualized using a halo and icon near concerned area
Tendons: These are visualized using a lineRenderer. All tendons are stored in one container object, which itself is a child of the middleware mode.
Four exemplary tendons with different forces applied
Skyboxes: Two different skyboxes were created to be used as the background: the Roboy skybox containing Roboy as a constellation in the night sky, RoboyAngels contains the faces of all Roboy angels. They can be set in the VRUILogic.
Core
This layer covers the UI logic and certain modemanager. It displays the selected modes, provides the frontend with the given input, informs subscriber of certrain topics of changes.
- Scripts:
- SelectionWheelScript: This script is attached to a gameobject within a canvas, which will be disabled in the beginning. Additionally, all the children of the component are realigned to fill the selection wheel according to the number of elements. The script constantly checks for input when activated. As soon as input is detected, it enables the canvas to display the wheel and all the child objects. These are rotated on a circle according to the position of the sensed input on the controller. The controller can be set in the public variable Controllerindex. The placement on the circle, where the element should be selected, can be changed in the public variable selectionIndex. This index specifies the index within the number of game objects, which shall be selected. It starts at 12 o’clock and rotates clockwise. Since the script is general in implementation and usage, it can be used multiple times under different occasions.
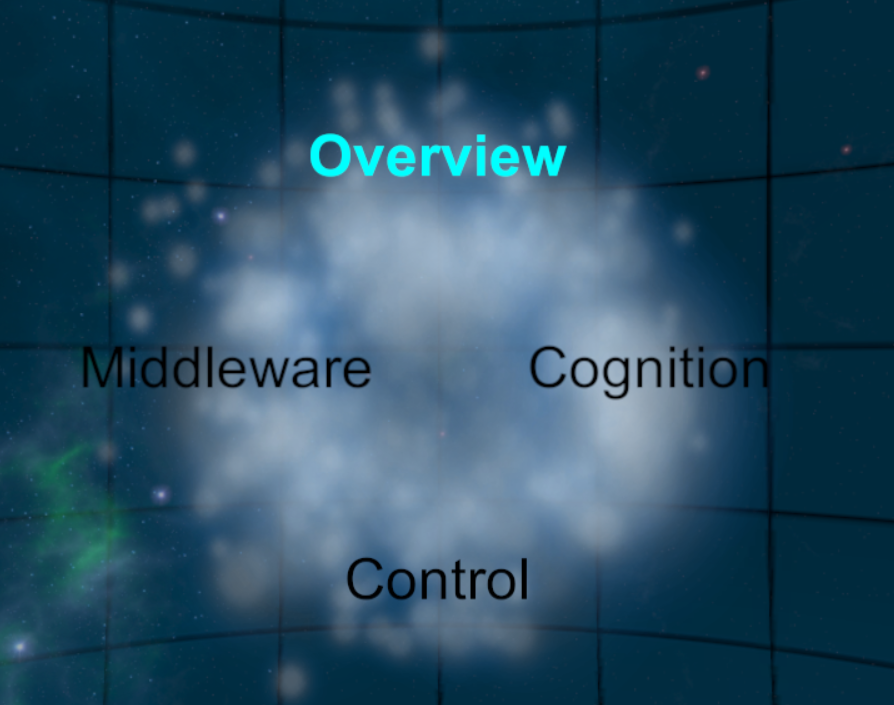
Selection wheel with four options and Overview selected
VRUILogic: This script operates as a database for important game values. Due to its Singleton implementation, there are no dublicates, the data is not concurrent, it is always accessible and all functions can use it as a data platform. It is designed to act passively, it does not contain an Update() function and does not actively request data. Other functions and instances can set and get the desired data. This design choice was made because it assures modularity of the respective elements, both front and back-end. This way, in case parts of the front- or back-end are no longer necessary or fail, no other components are affected. This design proved to be challenging when considering the age of the given data when later used. Functions requesting data are not presented with changes, only the current stage, which makes updates rather tedious. Therefore, the Observer-Pattern was used to inform components which need to be updated on changes. These previously added themselves to a list of subscribers. Additionally, other values such as user input and textures for notifications are provided to all other components. The textures are user-defined as can be seen in the following picture.
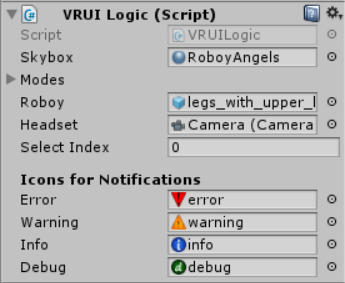
VRUILogic script with all fields defined
DummyStates: This class provides the enumerations used for notifications. This needs to be synchronized with the Control team and their error detection states and types.
Game Objects:
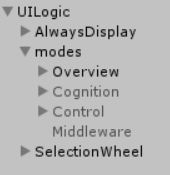
Component hierarchy in object view
UILogic: This empty game object is not displayed, but contains all relevant UI components as child objects.
modes: This game object contains all mode objects, which function as containers themselves.
SelectionWheel: This object contains all components needed to display the selection wheel. This includes a canvas, a background, a wheel base image, the wheel objects and certain scripts.
Back-End
The back-end connects the Unity application to external components providing the data that is to be visualized. ROS, short for Robot Operating System, is the framework used to communicate Roboy’s data clustered in topics accross different platforms and computers. An Ethernet connection is used for entities to either publish or subscribe to certain topics hosted on a server. The connection to Unity is implemented using the plug-in ROSBridge, which provides subscribing and publishing functionalities and defines standard message types.
Additional message types were defined to receive the needed data and parse it access the tendon and notification data. These include:
TendonInitialization.msg: This message is called once when a tendon is initialized. Therefore, all wirepoints, a list of body parts each point is connected to, the maximal applicable force and the tendonID are sent.
TendonUpdate.msg: As soon as the tendon is initialized, only the force value needs to be updated. Therefore, only tendonID and the force value need to be sent.
Notification messages for different notifications types: Each notification is created using the same values and attributes as of now. This includes the concerned body part, the state that is to be communicated, a message and additional content, the latter two both in string form.
For each message type, a specific subscriber had to be defined, such as TendonUpdateSubscriber, TendonInitializationSubscriber and so on. Each of these script subscribes to a certain topic and listens for the dedicated message type. As soon as a new one is received, it is parsed and the information inserted into the database.
For all subscribers to work properly, they needed to be attached to a game object which also holds a ROS Object component. This effectively informs the plug-in, that these subscribers are to be activated when starting the application.
Game Objects:
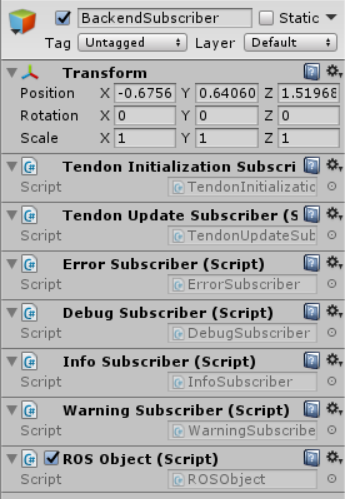
Game Object containing all subscribers and a ROS Object component
BackendSubscriber: This component containas all subscribers as well as the ROS Object component mentioned beforehand.
ROSBridge: This component facilitates the communication with the ROS Server. To function properly, the IP-address needs to be updated manually to the current address where the server is hosted.